 Ok to continue my crazy idea of completing a multi storey building in one file in ACA.
Here's a sample drawing with all layers turned on (not any different to look at from X-ref'd level files) and the rendering (incidently done in a seperate file after the CD's were completed because I couldn't resist. Design by others.

The Cutplane & Display Configurations


Now I move to the CutPlane tab and add the lower floor to current floor height to bring the cutplane to the same height for the 2nd floor. Ok out and test in your display Configuration selection box that you now have a new config to select ready for your second floor.
You can create these extra configs for any of the DR's that you use. I would generally only create 3 extra for a 2 storey home and no other fiddling is necessary but you may need more depending on the type of documentation required.
Z Plane and the Elevation
 Of course when you draw a wall you need to be able to restrict the baseline to the current level and not snap to some line lower down. The OsnapZ variable does this for you and the button is to the right of the Elevation setting. My lisp reads the 2nd floor height you set via a 'SetFL2' command and wrtes it to the Elevation setting and then locks the current Z plane to that height (sets OsnapZ to 1) and you can be confident that the any snapping will ignore the Z height. Issueing L1 will return back to the ground floor Z plane and elevation height.
Controlling Display
 So how do we flip from Ground Floor to Upper Floor to Ground Floor Electrical to roof plan?
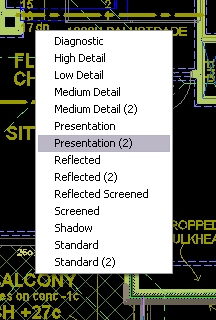
Actually I don't use a roof plan but I could. Simply by using lisp to automatically execute the -Layer command and using wildcards to turn layers off and on I can instantly switch between various groups of layers. L21 will switch to the 2nd floor but show the underlying walls of Level 1 locked so they can't be moved. L1E would show the Ground Floor but without text and dimensions and also show the electrical layout not shown for normal Ground Floor plan. Basically by following conventions and grouping rules with my layer names I can create simple lisp routines to get whatever display I need. As yet I don't control the Display Configuration via lisp completely and on issuing a level change command, the dropdown list will popup allowing you to cancel (if the current one is acceptable) or select the new display rep to change to. I know the tools to change are there but I need to step up my lisp learning to get the job done.
So that's it. Relatively simple for something I desired for years to accomplish and now am using successfully in production with significant productivity increase and ease of use with some simple Autolisp. As I said at the start, I am disappointed that this wasn't presented as an option now that I know how simple it is to implement. I am happy to send you a sample file and a copy of my ever evolving lisp file to check out so drop me a comment with you email (will NOT be published) and I can do that. I hope I have presented this in a way that doesn't scare you off. Drop back and check out the reasons why this is such a good idea for smaller projects if I haven't yet convinced you. See here if you missed parts 1 & 2 for all the MultiLevel posts..
Next I need to share just a little more work on stair so you can use a single stair and see it differently on the ground floor plan and the upper floor plan. Odin Cary discussed this problem years ago here and I did use something of his logic (developed for the PN) to use in my system.
cheers