Structural objections !
James sent me a bunch of Structural Members he's been playing with that look great except they're not really structural members! In the great spirit of not accepting a 'tool' for what it is but exploring what it could be James has used SM's to create excellent 2D detailing tools for those repetitive items. In case you ask the obvious question "what about using the Detail Componant Manager" which is designed to do this, it's not set up with australian details and there has been no Australian issue like the UK version. We'd have to customise the database and then learn how to upgrade and maintain yet another Tool! But yes you could use the DCM :-)
I've been tinkering with Dynamic Blocks to do much the same thing but there is a real advantage for an ACA'er using Structural Members. The more you use a tool the better you are in applying it and SE's can be very handy in virtual construction. For e.g. Structural members are great for creating a steel beam, adding end plates and the repeating cleats at set distances. So essentially the tool can also be used for 2D work in the same way.
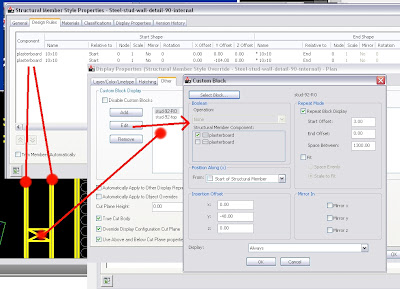
The disadvantage is that blocks can't be rotated or mirrored so you basically have to create the block in the orientation you want to insert it. However in the case of the roofing purlins in the example shown, the whole SM is simply rotated to the pitch so the purlin block would be inserted as though flat anyway. Here's a bunch of wall styles SM's. Constant materials like wall cladding are componants of the SM. Periodical items like studs or hanging straps are added as blocks.
 So you end with dynamic detailing componants that will stretch and add components automatically! You do need to know when to create a separate style as in the window sill illustrated here. It's attached to the window instead of the bricks. Sometimes things get TOO complicated and besides, separate components gives you extra flexibility.
I hate fiddling with those repetitive sheet profiles.
James, having done much more commercial work is good with SM's. Myself I still struggle to understand why I must create a pier base sideways to get it to insert properly. But the more I use any of the tools and 'get' how they work I get increased productivity in knowing just how to use a tool, where to use it and when it won't do. I can model most things very quickly now because I understand what tool to use and how to use it effectively. Doing what James has done with SM's is going to teach you a lot about Structural Members
So I might as well share with you some of James' other tricks.
I blogged an option for displaying Vertical profiles mainly for the purpose of rendering but James showed me a better way using a curtain wall, with only Profiled Mullions showing, in the shape of the sheeting. CWA's can have their roof or floor line edited-in-place for easy matching to a building shape and the profile follows suit. The curtain wall might contain other componants but here it gives flexibility for the sheeting alone. This is a good quick way of get vertical profiled sheeting into your model. Through components you could control different display for different display reps. ie. this for 3D, just hatching on another component for aecElevations.

Here is a wall style James developed for use in large commercial projects. Adding components for sheeting, insulation, cladding and each expected purlin and then adding a sweep to each purlin component you get a detailed wall that will section, elevate and off course display well in plan. Being a wall it will cleanup, has roof & floorline edit and the subsequent purlin components will appear as your height increases. Higher wall this time? Add (copy) some more purlin components in your wall style, add sweep and you're done. If your wall is low, the higher purlins don't appear.
Hope that helps stretch the paradigm a little for ya!


 So you end with dynamic detailing componants that will stretch and add components automatically! You do need to know when to create a separate style as in the window sill illustrated here. It's attached to the window instead of the bricks. Sometimes things get TOO complicated and besides, separate components gives you extra flexibility.


No comments:
Post a Comment